
Recommended Audience: Anybody with an Infrastructure, networking, vSphere, and NSX -V background.
What to expect from this post: Prepping the NSX-T environment for configuring “workload management” in vSphere7 with Kubernetes.
NSX-T Implementation Order > Create an Uplink Profile
Here are the high-level implementation steps that we’re going to follow to deploy and configure NSX-T Manager, so we can make it ready for configuring “Workload Management” on vSphere 7.0 to enable Tanzu Kubernetes Grid.
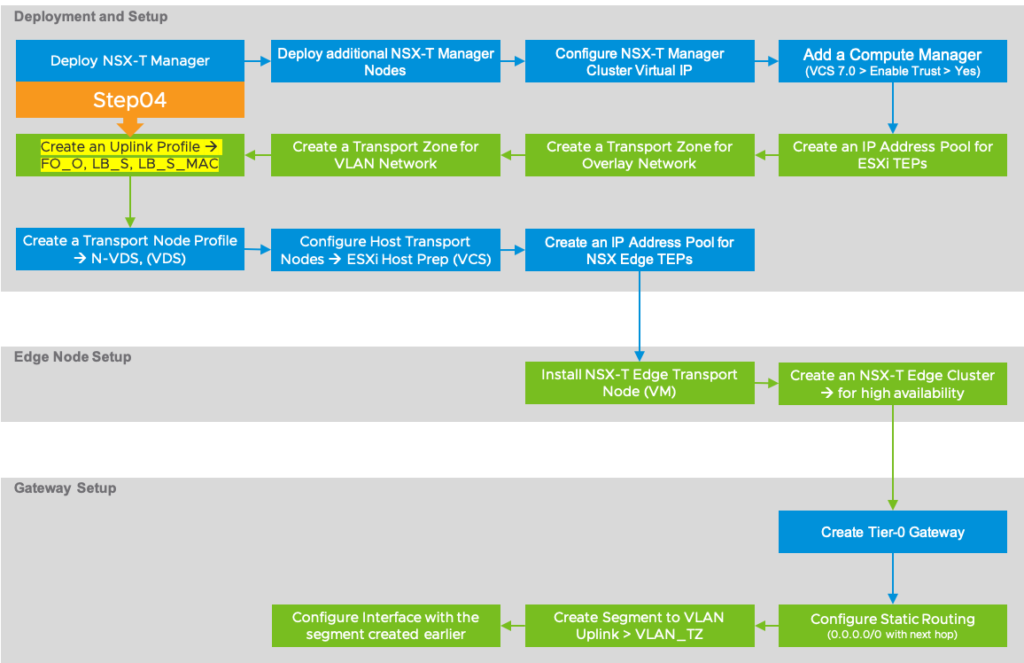
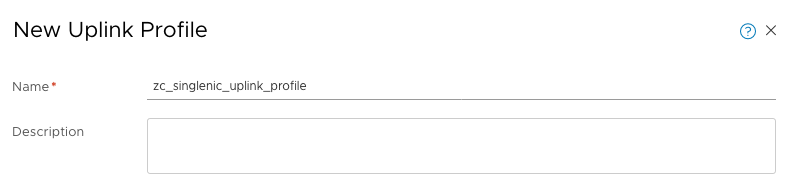
Create an Uplink Profile
The uplink profile defines the properties such as teaming policy, active/standby uplinks, MTU, etc. for the physical network adapters of the transport nodes, particularly for VDS (vSphere 7.0 or later) and N-VDS Switches.
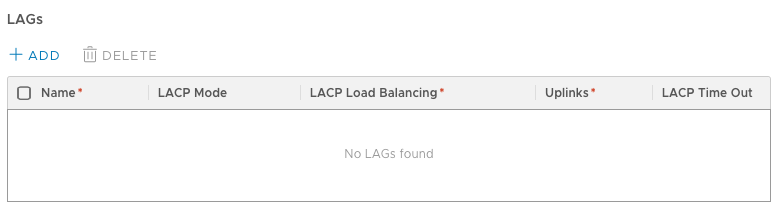
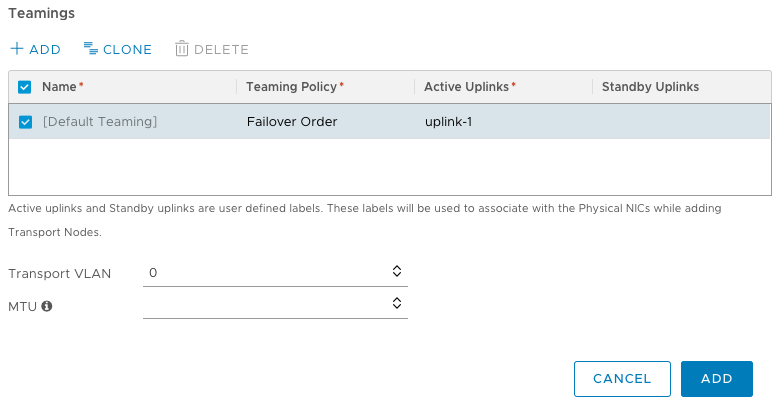
Click on System (top-menu) > expand Fabric (left-menu) > click on Profiles (left-menu) > make sure Uplink Profiles is selected at the top > add a new uplink profile by clicking on “+ADD” button > provide a name > under LAGs, leave as the default unless you’re using lags in your environment > under Teamings, leave everything as it is and click on the pencil icon next to Active Uplinks and type uplink-1 > leave Transport VLAN and MTU as default and click ADD as shown in the screenshots below.

This step is probably the easiest thing ever and time to move onto step05.