Recommended Audience: Anybody with an Infrastructure, networking, vSphere, and NSX -V background.
What to expect from this post: Prepping the NSX-T environment for configuring “workload management” in vSphere7 with Kubernetes.
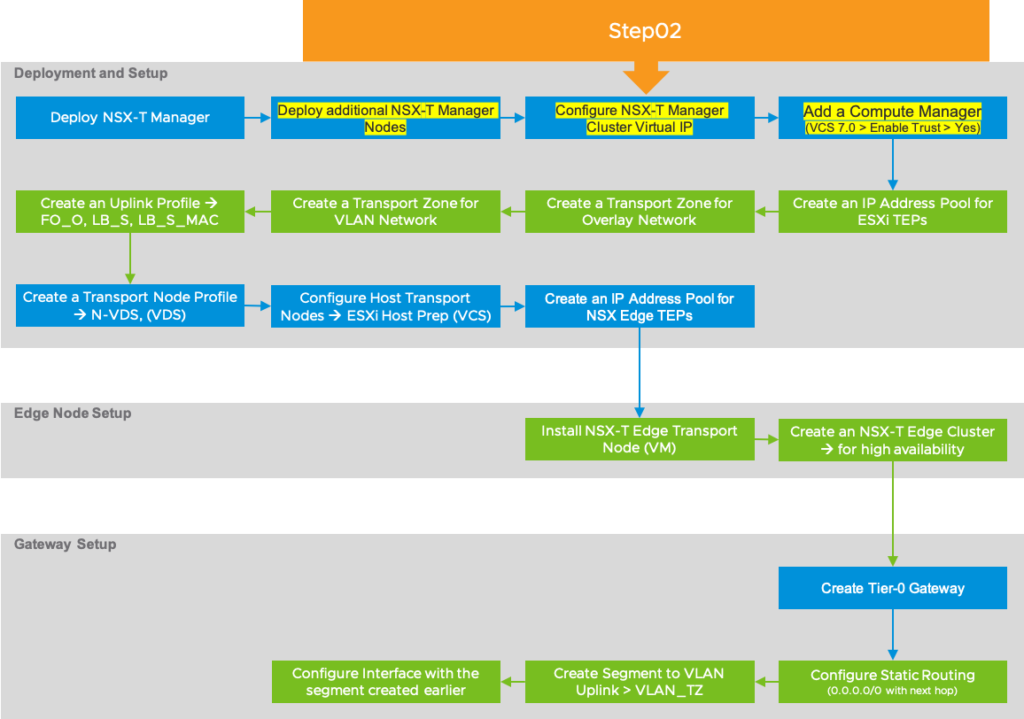
NSX-T Implementation Order > Add a Virtual IP > Add a Compute Manager
Here are the high-level implementation steps that we’re going to follow to deploy and configure NSX-T Manager, so we can make it ready for configuring “Workload Management” on vSphere 7.0 to enable Tanzu Kubernetes Grid.

Open up a browser and log in to the NSX GUI, https://nsx-t01.zerocloud.com using admin, and the password you created during the deployment.

Accept the EULA and click Continue.

Join the customer experience or don’t join and click Save.

Uncheck “Don’t show this again” and click Got It!

First things first > click on System (top-menu) > Licenses (left-menu) > Add a valid license key.
Deploy additional NSX Manager Nodes:
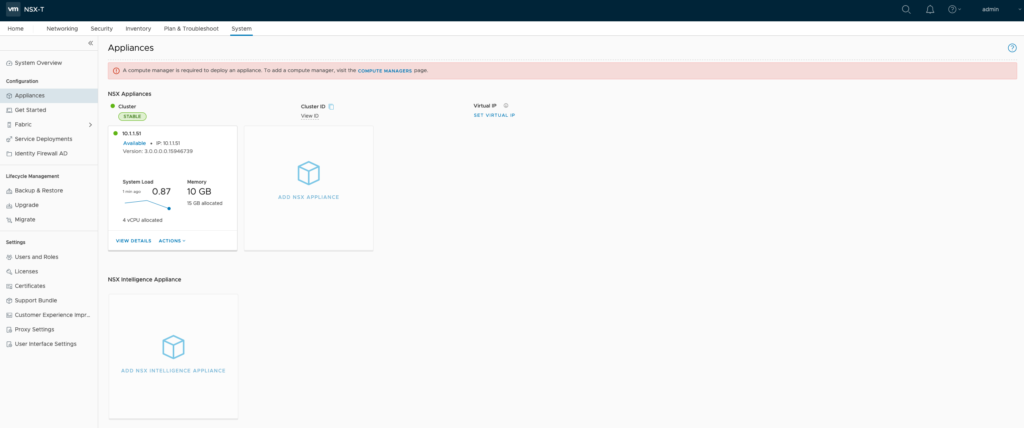
Click on System (top-menu) > Appliances (left-menu) > at this point additional NSX manager node appliances can be added by clicking on “Add NSX Appliance” and following the instructions > Per NSX-T Architecture post, it is recommended to have at least 3 manager nodes > Click on “SET VIRTUAL IP”.

Configure Cluster Virtual IP:
Virtual IP is a load balancing mechanism for API and GUI client access, where the requests are sent to the active manager node. As outlined in the NSX-T Architecture post, the API and GUI are available on all the manager nodes and they ought to be configured on the same subnet, when configured for Virtual IP. In this case, traffic from the Virtual IP is not load balanced equally across the manager nodes, instead, a leader is elected and assumed as the active node and all the traffic will be directed to it.
The other way of configuring the load balancer is using an external load balancer (either NSX or 3rd party), where all the management nodes (API/GUI) can be active and they can exist on different subnets. We’re not covering that in this post.

Add a Compute Manager (register a vCenter Server with NSX Manager):
Click on System (top-menu) > expand Fabric (left-menu) > click on Compute Managers > click on Add. Provide all the vCenter information as outlined here and slide “Enable Trust” to Yes and click Add.

Click Add, when prompted with Thumbprint is Missing warning message.

Make sure that the Registration Status is “Registered” and Connection Status is “Up” > this confirms that the vCenter Server is successfully registered with the NSX Manager and you’re ready to move on to step03.

